Sellers May 27, 2023

Get Organized for the Big Move

Love Selling Your Home Series

This series, Love Selling Your Home: Minimize Your Stress, Maximize Your Profit, is a step-by-step guide that covers everything you need to know to sell your home in todays market, from finding a real estate agent to all the way to settlement day.

You’ve got mixed feelings about moving right now — excited to make new memories in a new home but somewhat sad to be leaving your old home. No matter what, you’ve got to get organized and focused for your big move and all the details it entails.

Here are some ways to help you NOT feel overwhelmed leading up to your move (and your settlement day). Doing some preparation months or weeks ahead can make a huge difference in the final days, so keep that in mind when you first list your home.

Find an organization system that works for you.  Whether you create an “old-school” binder or find an online app that can keep you on track, take the time to stick to a system and use it. It can be a great way to stay organized and have all your information in one spot.  Keep your estimates, receipts, check lists, phone numbers, and even an inventory of items being moved. This can relieve a lot of stress during the entire process.

Go through ever room to sort and purge.  Basically, don’t move things that you don’t use or want anymore! Moving should force you to throw things out or donate or recycle. However, you really should make some headway on this BEFORE you put your home on the market.  A clutter-free home has more appeal to buyers.

Don’t forget to dispose of any toxic or hazardous materials you may have lurking in your garage or basement. Check with your community to see where these can be disposed.

For those items you will keep, make a list of what needs special packaging or extra insurance coverage for the move.  What about any large paintings or fragile pottery?

Research movers and get written estimates to compare costs. Ask friends and family first about reliable movers they have used recently. Do not rely on a quote over the phone since you should request an on-site estimate. You’ll also get an idea of how long it will take to pack up your home and move it to the truck. Are you in a condo building and have to use the service elevator or in a townhome with no parking close to your home?

About a month or two before the move, select a company, confirm the date and arrival time, all costs, both addresses, and any details so you avoid any confusion during the actual move.

Get supplies for the move. If you aren’t receiving boxes from a moving company, ask around for some to reuse or order new ones. Also make sure you have a stocked supply of tape, bubble wrap, and permanent pens if you plan to pack yourself.  Don’t forget you can even go green by using towels, sheets, and blankets to protect items. Your mover may be able to supply wardrobe boxes and dish barrels but double check.

Let others know you are moving and provide new address or cancel services. Contact the post office with your new change of address.

Also directly contact others to cancel their services or to let them know your new address if you’re continuing their services. This can include vendors for your lawn care, pest control, pet walker, newspaper delivery, house cleaners, gym, swimming pool club, etc.

Notify any health professionals about your move and new address.  Depending on how far you move and if you will continue to be a patient, you may need to have any medical records transferred or forwarded to a new health care provider. Also contact your pharmacy with your new address, and refill any prescriptions as necessary so you don’t run short the days around the move.

Don’t forget about notifying your banks and other financial institutions, your credit card and insurance companies, broker, employers, etc.  If you have a bank deposit box, remember to schedule a time to clean it out if necessary.

If you have children, make sure their school records are sent to the new school district.

Have a plan when packing your items. First, pack things that you don’t use as frequently and go from there as you get closer to the moving day. For example, are there certain toys your kids don’t use all the time? Are there items already stowed away such as crystal glasses and china that you don’t plan to take out anytime soon? Get them in boxes now!

Also make sure you pack one or two boxes with essentials that you will need right away when you move into your new home.  Keep track of these boxes!

Items such as expensive jewelry or important files should be moved to a secure box that you can move personally, if possible.

A few days before the move, pack some suit cases with clothes, shoes, and personal items you will use during the first few days in your new home. Don’t forget shampoo, your tooth brush, any prescription or over-the-counter drugs.  Even if you’re not going cross-county and just heading down the road, plan like you’re going on a trip. Plus, why not use those suit cases, since you need to move them anyway!

Label your boxes. Yep, it’s that simple but very important. Label what is in the box, what room it is going into, and even give it a number. This can help you keep an inventory of your belongings and let you know if you’re missing a box or not.  Some people take pictures of items in boxes and store for reference later on.

You also can use color coded labels if you want to be even more organized. Maybe red labels could mean there are items you need soon after you move in rather than a box that can be unpacked much later.

Plan to have someone in your family onsite supervising the move.  Always verify that it’s the correct truck and company. Meet with the supervisor to go over the details of the contract, which should have an inventory list.

Keep a copy of any signed documents and don’t forget to exchange cell numbers! Also, it’s nice to tip and provide refreshments to the movers who will be working hard all day for you.

Scope out your new home. If your new home will be vacant before you move, you can spend time measuring the room sizes to see how furniture will fit or not. You can also spend time picturing how you want to set up the rooms so you know where to tell the movers to move certain pieces of large furniture or artwork.

If there’s even more time between moves, an empty house is easier to paint or refinish floors if that’s the plan.

Leave your home broom sweptclean and tidy. Don’t leave a mess for the new homeowners or any garbage. You don’t legally have to hire a cleaning service to make it spotless. It’s not a beach rental!

However, you have loved this home so make them feel welcome and relieved when they arrive.  Leave your old home the same way you would want to find your new home that day.  The new owners may get some mail of yours or packages, so keep it friendly and cordial.

Don’t worry, as your agent, I’ll help you make sure you have everything you need when it comes to this stage of the process. Feel free to email me, text me, or call me.

Stayed tuned for next weeks last article! How to Make Settlement Day a Success will help you plan for a glitch-free day and give you a rundown of what to bring and what to expect for the meeting.


Buyers May 18, 2023

Maintaining (and Loving) Your New Home

Here’s a bonus article for my 13-part series, Buying a Home 101. This step-by-step series took you through the entire home-buying process — from finding a buyer’s agent to settlement day. Now you’ll learn a few tips on how to take care of your new home and make it yours!

Being a first-time homeowner can be exhilarating and fun at times, with lots of freedom to make it your own space. You don’t have to answer to any landlord or roommate!

But, it also comes with responsibilities.

When something breaks, it’s not an easy call to that landlord anymore. You’re the one in charge of any repairs, maintenance, finances, and improvements over the long haul.

Plus, making your home more “yours” and becoming a member of your community also are part of your to-do list now. You’re not a renter anymore but putting down roots.

This first year will have some highs and perhaps some lows, and most of it will be very new for you. Here’s some guidance on everything you may encounter as you get your feet wet.

These 20 tips below provide a good overview of what you can do to maintain your home AND make you a happy homeowner:

1. Create a home manual JUST for your home. Find a system that works for you so it’s like a one-stop-shop, whether you find an online option such as iCloud or Dropbox to store documents or if you prefer to go “old school” with a binder(s) and plastic pockets to stuff receipts, etc. Make sure it’s something that you will use and keep you organized.

You’ll need to keep important documents about your home and its systems (many new owner manuals are online); service records; warranties; the age of your roof, furnace, water heater, washer/dryer, refrigerator and other important appliances; even include paint colors and other decorating information; receipts for furniture. Don’t forget to include any landscaping work and how to care for your plants, shrubs, and flowers.

2. Maintain an updated list of phone numbers of service providers. This list should include your plumber, electrician, utility company, landscaper, HVAC, etc. You’ll be able to contact them quickly when needed. Also keep notes on each of their visits and get second opinions for larger repair or replacement recommendations. Again, choose to go electronic or paper.

3. Keep records and receipts of your home improvement and maintenance costs. Whenever you do sell, these records show where you have added value and what you’ve done to keep up your home. Several types of improvements also can qualify for tax incentives so be sure to share the receipts on a yearly basis with your CPA.

Tips 1 through 3 above are also great to have when you are selling your home. The buyers will love it and be confident they are purchasing a home that has been well cared for!

4. Keep a realistic pace and budget for buying things you need for your home. Having a home means there’s always a long list of big and little things you need to buy or want to upgrade, especially if you’re a first-time buyer. The list could go on and on — from window treatments, lawn mower, rakes, cleaning supplies, vacuum, a sectional couch, deck furniture, lamps, etc.

You’re going to grow with this home so make a plan and a budget. If you do need to buy, then shop for sales, bargains, flea markets. Buy off season or at the end of a season for major savings. For example, you can get a great deal on patio furniture in September!

5. Have an emergency fund for any unexpected costs. No matter how well your home has been taken care of by you or the previous owner, there are going to be some unexpected surprises, so be prepared. Something will break and you won’t be able to delay fixing it – a cold winter night and your furnace stops working, a tree falls on your house, or a baseball goes through one of your windows. Expect the unexpected!

A good rule of thumb is to expect to pay about 1% of your home’s value in maintenance and upkeep costs per year. If you budget for the “unexpected,” it won’t be such a surprise cost.

6. Cut the costs of utility bills by conserving how much heat, electricity, A/C, and water you use in your home. You’ll save the planet and your wallet! Turn down your heat and wear sweaters in the winter; and set an automatic thermostat at an efficient temperature in the summer and winter months. There are so many options out there right now! First-time homeowners can contact their utility companies for an estimate on rates for each month of the year to help with their budget.

7. Hire an accountant so you know how to prepare your taxes correctly. You can better ensure that you’ll maximize your refund and get the deductions you deserve. The tax code can change and a professional stays up-to-date on how it can affect homeowners. Even getting them done by a professional one time is a good idea since you’ll have a template for the next year. You also may learn you’ll get tax credits on energy efficient appliances, etc.

8. Double check that you have enough homeowner’s insurance. It should include flood and fire protection plans. Also take out life insurance coverage so your family won’t lose their home. Ditto on having disability-income insurance so you can stay in your home. Always talk to an insurance professional for their advice on your particular situation.

9. Don’t ever ignore any problems or damage you see in your home. A minor problem can turn into a big, more costly one before you know it! Consistent, regular maintenance of your home is important to combat the usual wear and tear. Make sure you schedule important tasks for your fall, winter, spring and summer maintenance. By doing this, you could prevent more extensive damage from any severe weather conditions such as flooding, snow, ice, and heat.

10. Create an inspection list and go through your home twice a year, once in the spring and once in the fall, to check on the condition of each item. You don’t need to hire an inspector; you just need to have the keen eye of one just like when you bought your home.

Your list should include both inside and outside items: roof, windows, foundation, gutters, attic, insulation, HVAC, chimney, driveway, and etc. Look for damage from water leaks, mold, and pests such as termites, mice, squirrels, rats. Flag any key life expectancies when you conduct these inspections so you can examine more carefully near that time. For example, your roof can last 15-20 years if it has asphalt shingles, or more if it has slates.

11) Know your major appliances – such as fridge, stove/oven, dish washer, washer/dryer. Know how they work, how to maintain them (like changing your filters), who to call for repairs, and how old they are now and their life expectancies. How long they last depends a lot how you care for them . For example, a fridge can last from 9-13 years; air conditioning unit from 8-15 years, a water heater 10-11 years. Again, keep all owner manuals and other necessary receipts for easy access.

12. Buy tools you’ll use regularly to maintain your home and to make minor repairs. Every homeowner should have a tool box but don’t go out and buy something you may only need once; you can sometimes rent or share the cost with friends or neighbors. Experts say you should buy a tape measurer, utility knife, four-in-one screwdriver, hammer, putty knife, saw, wrench, pliers, and drill/driver. Every homeowner usually goes through a tube of caulk each year.

13. Learn some basic DIY skills that can save you time and money on repairs. You can find lots of information online or on YouTube with basic how-to’s on just about everything. From how to unclog a drain to how to patch a hole in the wall … it’s endless! Also consider taking some classes at your local hardware store, who hold inexpensive one-day workshops. You can save so much per year if you can do some of the basic repairs and upkeep yourself.

14. Hire a qualified contractor or handyman for more complex jobs. This is when it’s important to have a higher level of expertise so you can maintain the value of your home, not detract from it. No future buyer likes to see a shoddy and unprofessional job! If it’s something more complicated than a clogged drain, for example, maybe that’s where you draw the line on the DIY.

15. Be patient and don’t expect your home to look like a HGTV makeover overnight. Reality-TV is much different than reality! Those shows are worth watching since they can inspire you with ideas for all the rooms in your home and even your yard. You probably won’t feel like your home is ever “done” — it’s more like a work in progress and you’ll feel like you’re constantly making it “yours.” Learn to accept this so you don’t ruin your budget or rush projects.

16. Live in your home for a while to get a feel for the ebb and flow of it. The time spent doing this will help you decide what furniture you really need and what will function best in certain spaces. There’s no harm in some empty rooms for a while! If you plan to eventually remodel, you’ll be more confident in knowing how your family actually moves about your home if you wait a bit. And again, budget and pace yourself with your purchases of furniture, window treatments, and accessories.

17.  Paint is a cheap, quick fix-up. A can of paint will completely transform a room. You can save thousands just by painting the right colors, which can satisfy your HGTV envy. Enough said!

18. Try to forge a good relationship with neighbors. You don’t have to be overfriendly if that’s not your style but neighbors can be a good source of information about the community and help you out when needed (borrow that shovel you never bought in time or an onion for that chili recipe!).

19. Do what you can to help to create a positive community feel to your condo, street or neighborhood and make it a place you will love to live in. Get involved and attend your condo meetings, help host an annual block party on your street, or hold regular summer happy hours, etc. Plus, having a great community feel can be a good selling point when the time comes.

20. Sign up for a neighborhood listserv or community blog, Twitter or Facebook accounts to get all the inside information. You’ll know what’s going on in your neighborhood (someone just spotted a fox!) and get recommendations for a handyman, plumber, mother’s group, or even a piano teacher.

I hope these tips will keep your home in tip-top shape all year long and you’ll love being a homeowner. Enjoy your first year and remember that all of this will be beneficial to your home whenever it’s time to sell! Feel free to email me, call me, or text me.  I am here to help you!

Buyers May 11, 2023

How to Make Your Settlement Successful

This step-by-step series will take you through the entire home-buying process — from finding a buyer’s agent to settlement day, and all the details in between. Every first-time buyer will find this information-packed series easy to follow and understand.

This series ends with today’s article but stay tuned next week for a bonus article on maintaining your new home!

You are almost a homeowner! But before you can celebrate, you’ve got to gear up for a successful settlement day. And that means no surprises, no delays, and no leaving without the keys to your new home.

There is a lot to do on the days leading up to your closing and settlement. You’ll be better prepared and on top of everything if you know what to expect. Some of these tasks were covered in last week’s article, Almost There…Pre-Closing Details for Buyers.

Today’s article will touch on some of those tasks again but will also cover more of what happens during the settlement. That way you stay calm and know what to expect!

Here’s a handy breakdown of what you need to do at each stage of the process:

Pre-Closing Tasks to Complete:

Get homeowner’s insurance. Make sure that it starts the day of the closing; no later, even if you are moving in later.

Don’t hurt your credit (loan!). Do not do anything that could change your financial circumstances, such as opening a new credit card account, getting a new auto loan, charging too much on your current credit cards. Even buying furniture before your settlement is a bad idea. This could delay or even cancel your mortgage. So hold off on any shopping sprees for your new home!

Connect your utilities. Make sure you make it effective for the day of settlement, even if you are moving in after settlement. The seller will turn them off in their name the day of settlement since they will no longer be the owner of the home. To avoid any reconnection fees, make sure the utilities start in your name the day of your settlement.

Give yourself enough time to move funds around. Please be aware that banks typically put at least a 3 day hold on large transfers. If you’d prefer to wire your funds directly to the title company instead of bringing a certified check, get the instructions from your agent.

Settlement Day To-Dos and Logistics:

Your Final Walk-Through

You will be allowed to do a final walk-through of your home prior to closing. Schedule it earlier in the day so you can complete it before you head over to the actual closing. It should take about 30 minutes.

This is your opportunity to see if any damage has been done to the property and if any agreed upon repair work has been completed. Carefully go through the home this one more time to see if anything is amiss since you have the opportunity to bring it up at your settlement (not afterward!).

You are not doing another inspection, but just making sure that any repairs that were agreed upon have been done and ensuring the home is still in the same condition as when you wrote the contract.

What to Bring to Closing

  • Bring your driver’s license or some form of photo ID.
  • The settlement company will calculate the amount of money you need to bring to the closing. You’ll need to bring a certified check for this amount. Also make sure you also bring your checkbook just in case any minor last minute corrections need to be made.
  • Bring all important documents that you have gathered during the home-buying process, proof of homeowner’s insurance, contract.
  • Obtain a copy of the Closing Disclosure form (it replaced the HUD-1 Settlement Statement). This form lists all final terms of the loan you’ve selected, final closing costs, and the details of who pays and who receives money at closing. Your lender should send you a Closing Disclosure at least three business days before closing.

What to Expect at the Closing

You and your agent should plan to attend the closing at the specified time at the settlement company’s offices. The sellers also will be there with their agent. Many closings can take more than an hour, so plan accordingly if you have to take time off from work.

This is the day where the sellers will legally transfer the property to you. The settlement company acts as a third party overseeing the terms in the contract to ensure they are being carried out and the transfer of ownership occurs. They don’t represent you or the seller, but the terms of the contract.

This company also handles the closing process for that day. This is to ensure that all parties involved (you, the seller, your agent, their agent) can properly oversee the transaction.

The settlement company will handle the documents, money, and any other items from all parties and make sure that everybody gets paid where necessary.

Stay calm! You will be signing a lot of documents that day so make sure you understand and know what you are signing. Ask questions and confirm amounts if necessary.

Congratulations … You bought your home!

You’re all set to move into your new home now that you’ve made it through your settlement. It’s time to celebrate and start unpacking.

Now that you’re a homeowner, you’ve got to take care of your new home. Next week’s bonus article, Maintaining and Loving Your New Home, is perfect for you. I hope you have enjoyed our Buying a Home 101 series and that it will help you become an informative and confident buyer.

If you’ve enjoyed this series, I’d love the opportunity to help you become a homeowner.

Our first step together would be a 30 minute meeting where we’d discuss the steps in the home buying process, talk about your criteria and see if you qualify for any first time home buyer loans that could save you money.

Even if you don’t think you are ready to buy for years, I’d love to meet you and help you put together a plan we can implement whenever you are ready. My goal is to help you when you are ready, not pressure you to do something that isn’t right.

So, email me, call me, or text me and let’s set up a time to talk more about you specific situation and put together a list of things you can do between now and when you are ready to become a homeowner. That way you’ll have all your ducks in a row when the time comes.

Buyers May 4, 2023

Almost there…Pre Closing Details for Buyers

This step-by-step series will take you through the entire home-buying process — from finding a buyer’s agent to settlement day, and all the details in between. Every first-time buyer will find this information-packed series easy to follow and understand. Make sure to tune in for the next couple of weeks as we wrap up this series!

You don’t want any surprises when you close on a home. As a buyer, ensuring a smooth transition to becoming a homeowner should be set in motion well before you sit down with the sellers that day.

Here’s a handy breakdown with your pre-closing to-do’s. That way you’re all prepared for when your settlement day arrives:

Check Off Pre-Closing Tasks

You’re moving in to a new home so you want to make sure it’s all ready for you and your family. Now is a good time to get certain appointments booked and accounts set up.

  • Connect your utilities— You don’t want to move in without any power turned on! Get in touch with the electric to set up your new electric account. You can sometimes arrange a transfer prior to the sellers closing their account, and you will avoid a re-connect fee.

Depending on whether you have gas or if water is included in your condo fees, you may need to contact those services too.

Set up all of your accounts to start on the day of your settlement.

You can get cable and internet service at a later date (if you can survive for a bit!). However, you can schedule your appointments now for a convenient date.

  • Contact your insurance company—Make sure you have your homeowners/hazard insurance starting on the date of settlement as well. Also be sure to send a copy of the policy to your lender. You pay for the first full year at settlement, so no need to pay anything prior.


  • Consider a Home Warranty—If you want to protect yourself in case anything goes wrong, you do have the option of buying a home warranty. The idea is that if something breaks that is under warranty, you would call the home warranty company to repair or replace it.


  • Get Prepared for Closing Day
    When the big day arrives, you want to make sure you have everything you need, including any necessary funds. Don’t be rushing around at the last minute, so read over the list below.


  • What to bring to settlement— Bring your driver’s license and a certified check made out to the title company for the rest of your funds that you still owe. If your check isn’t enough, you can bring a personal check and write it up to $1,000. It’s always good to bring a personal checkbook for any last minute items.

If you are moving funds around, please be aware that banks typically put at least a 3 day hold on large transfers. If you’d prefer to wire your funds directly to the title company instead of bringing a certified check, the title company get get you write instructions

  • Be aware: Due to unfortunate wire fraud recently, only access wire instructions by email IF the title company has also confirmed them with you by phone. Too many buyers have lost their downpayment, so do not wire any funds without verbal confirmation of the account number and wire instructions from the title company.


  • Obtain and review a copy of the Closing Disclosure form (it replaced the HUD-1 Settlement Statement). This form lists all final terms of the loan you’ve selected, final closing costs, and the details of who pays and who receives money at closing. Your lender should send you a Closing Disclosure at least three business days before closing. Once you receive it, let me know and we will review it together so you understand everything.


  • Final walk-through— Mark your calendar for the time to meet at your new home for the walk-through. This is usually scheduled just prior to the actual closing. This is your opportunity to inspect the home and its condition. It also enables you to confirm that any items that you and the seller have agreed to remain or convey are there.

This is an exciting time since you’re almost in your new home! You don’t want anything to be delayed or forgotten right now so double check that all tasks have been completed. Put a big red check mark next to each item when done!

I hope you now have the confidence and knowledge to buy a home!

Just remember, throughout this part of the process you are not alone—I’ll be in touch every step of the way making sure everything goes smoothly and you know what to do when. Plus, we’ll review all your settlement before you sign it at settlement, so that you aren’t nervous on settlement day! I’ve got you! Feel free to email me, call me or text me.

Next week is the final article in the series! It came too fast, so I’m also sending you a bonus article about how to maintain your home after you move in. Stay tuned for next week’s article — How to Make Your Settlement a Success. 

Buyers April 27, 2023

Review those Condo Docs!

This step-by-step series will take you through the entire home-buying process — from finding a buyer’s agent to settlement day, and all the details in between. Every first-time buyer will find this information-packed series easy to follow and understand. Make sure to tune in for the next few weeks!

Even though you’re buying a home when you purchase a condo unit, you’re actually buying into a “business.”

That’s why it’s so important for you to determine how stable and financially sound this “business venture” is before taking it on. And that’s where reviewing condo docs comes in.

What Happens When You’re Under Contract

Once you’re under contract to purchase a unit, you’ll have the chance to review a stack of condominium documents (condo docs). These documents will give you a better idea of the financial outlook of this particular condominium community.

And yes, it does seem backwards to review these docs after your offer has been accepted, but that’s how the process works!

Both you and your lender need to know what you are getting into with this purchase. This is a very important step when purchasing a condo unit. You will share in the financial responsibility of this condominium community with your neighbors. And your lender won’t give you a loan if there’s something amiss.

Take every ounce of that time to review these important documents and show them to a lawyer.

Condo Docs 101

Condo docs include but are not limited to the following parts:

Declaration;

By-laws; Rules/Regulations;

Financial Statements;

Budgets; and

Minutes from Meetings.

Let’s go over some of these below and point out what you should focus on during your review.

Financial Statements and Budgets

Basically, these documents provide crucial information on the financial status of your building. Most importantly, take a look at the condo’s reserve funds and operating budget.

•Reserve Fund: These docs will tell you if there are enough reserves. A reserve fund (or savings account) is used for major repairs or improvements to the building. Projects can include new windows or a roof, for example. A condo needs to build up reserves for future repairs so a percentage of your monthly fees should be deposited into this fund. Also make sure you see how that money is invested.

If your condo has a low reserve fund, it will require a special assessment (additional fees) when a major repair or renovation is needed. It’s something to consider if you’re looking at an older building, especially ones that are around 25-30 years old. Keep this in mind for older apartment buildings that have been condos for only a few years.

A good rule of thumb is at least 10 percent of the condo budget should be going to the reserve account. This is what lenders require before they will give a loan for a condo unit.

•Operating Budget: Your monthly fees are what fund most of the operating budget. Experts say about two-thirds of the operating budget should be used toward expenses.

See how your condo fees are allotted each month for employee paychecks, utilities, trash pick-up, etc. Remember, somebody has to pay for those hallway light bulbs!

Plus, if your condo has a 24-hour front desk, swimming pool, elevators, full-time engineer on site … these expenses add up and so will your fees.

Keep in mind that your condo association shouldn’t be dipping into the reserve fund for basic maintenance like trash removal, recreational facilities, common-area landscaping, etc. That’s a big warning sign!

•Delinquencies: It’s important to know what percentage of unit owners are delinquent on their monthly fees. If more than 15% are more than 30 days delinquent, Fannie Mae may not approve your mortgage. Plus, if too many units go into foreclosure, the association could go into a budget shortfall, which could mean a special assessment is issued.

Rules, Regulations and By-Laws

You want to check these out to see if you will be able to live by the rules and regulations of your condo community. Remember, you’re living with many other people, and there will be certain expectations and restrictions.

These rules can vary widely from community to community. In general, these documents could specify a range of items, including its pet policy, whether you need to have carpeting, can you install hardwood floors, or if you can rent out your condo at any time. Also, review any grandfather clauses since you might not have the same “rules” as an earlier buyer.

Other Important Questions to Ask

Definitely contact board members or the property manager to ask questions. This additional information can help round out your review of the condo docs. Here’s a “must ask” list:

•Are there any upcoming upgrades or projects planned in the building?

•How are those projects going to be paid for? Reserves? A special assessment?

•What projects are on the 5-7 year horizon? Are there adequate reserves being funded for these projects?

•What are the major issues the board is discussing at the last several board meetings? Ask to receive a copy of the board meeting minutes from over the last year.

• Is the condo experiencing any litigation? Whether it’s a small or large lawsuit, reserves can be deleted quickly to cover this.

•How much turnover occurs? This will tell you if residents are happy with the condo community.

•What percentage of the units is owner-occupied? Generally, the higher the percentage of owners, the more marketable the unit will be for resale. It’s not unusual to find some associations in financial trouble over short sales or foreclosures.

•What does the association’s master insurance policy cover? A list of coverage should be included in your condo docs. By reviewing these carefully, you can determine how much additional coverage you may need for your own unit.

Reviewing your condo docs can be make or break when it comes to being sure you have made the right decision about your first home and aren’t hit with any financial surprises after purchasing. I’ll help you to review them and know what to look for when we get to this step, so don’t worry too much about this right now. I only want you to know what’s involved and to hear things more than once so you are more knowledgeable when the time comes.

Want to know whether buying a condo is a good choice for our area? And, which condos are good and which to skip? Email me, text me, or call me and we’ll set up a time to talk more about condos in our area so you can understand this important aspect of your purchase before you make the big decision to invest.

We’re heading into the final weeks of this Buying a Home 101 series and also for your final steps to buying a home. You’ll get the nitty-gritty in the next article, Almost There … Pre-Closing Details for Buyers. It provides a breakdown of what to expect so you’re ready for the big day.

Buyers April 20, 2023

How to Navigate a Home Inspection


How to Navigate a Home Inspection

This step-by-step series will take you through the entire home-buying process — from finding a buyer’s agent to settlement day, and all the details in between. Every first-time buyer will find this information-packed series easy to follow and understand. Make sure to tune in for the next few weeks!

You don’t want any nasty surprises after you move into your new home, right? Getting a professional home inspection is one very important step you need to take once you’re under contract.

Your contract may include a contingency that gives you a certain number of days to complete an inspection. Once you have the results, you may ask for repairs, renegotiate the price, or even cancel the contract if needed. No home is perfect but at least a professional inspection gives you some guidance on what you are facing. Only you can decide what you are willing to accept or undertake if you decide to buy this home.

If any red flags arise, then you’ll need to decide if it’s a deal breaker or not. Of course, I’ll help you with making those decisions, but there’s not a “one-sized fits everyone or all circumstances” answer. It’s something you and I will talk through and I’ll help you make the best decision based on your level of comfort.

Here’s a rundown of what to expect from the inspection phase of the home buying process:

Inspector Who?
Make sure you hire a reputable and experienced inspector. You want to find someone who is licensed and works full-time in the field, who is affiliated with a professional organization. Also look for someone who is familiar with local building codes and with the type of construction and age of the home.

Items to Check Off
A home inspector will visually inspect the physical condition of the home and its major systems. A standard checklist usually includes: heating system; cooling system; electrical system; appliances — kitchen/bath/laundry; plumbing; chimney; framing/structure; foundation/basement; drainage; roofing; and garage.

What to Expect
Keep in mind that inspectors look for deficiencies that are in view. They won’t pull up carpet or look for any other hidden defects.
You can ask the sellers for permission to remove carpeting or paneling if something seems suspicious. If the inspector has serious concerns about a specific element, then you may need to hire an expert – such as a structural engineer, HVAC contractor, or plumber — to give you a more thorough evaluation.

If a home is vacant, make sure the seller has all of the utilities turned on during the inspection so the inspector can see how they operate. You don’t want to incur the cost of a second trip out to your home!

Time and Cost                                                                                                                                                                                                            On average, a standard inspection can take 2 to 4 hours depending on the size of the home and can cost several hundred dollars. Ask to be one of the first or second appointments of the day, so you have a “fresh” inspector who will take time at your home.

Special Services
For an additional fee, some inspectors may include inspecting items such as wood destroying insects, rodents, mold, fences, pools, spas, sprinkler systems, septic tanks and also environmental services, including testing for radon, lead, asbestos, carbon monoxide, and formaldehyde.

Usually a specific license is required to inspect these items so check to see if your inspector can handle them. If not, you will need to bring in an expert if you have any concerns.

Show and Tell
Having an inspection is a great opportunity to gain some first-hand knowledge about the home you are about to purchase. You should meet with the inspector after the inspection is finished.

After an inspection, you will see what type of systems exist in your home and their condition. You can also learn how to maintain them, which can be a big help as a new homeowner plus keeping up the value of your home.

It’s a good time to ask questions so you understand your home inspection report you’re about to receive.

Report Summary
After the inspection, you will receive a signed report that summarizes what was discovered. This report is your property and no other party is entitled to see it. Ask if you will receive the report on-site or if it will be emailed to you.

Remember, it’s important to understand that an inspection is not a warranty since it is limited to what is visually accessible at the time of inspection. Many inspectors carry errors-and-omissions insurance but their contracts often limit their liability to a refund of the fee.

Take the time to carefully review this report and reconcile it with the seller’s disclosure statement. If nothing is amiss, you can go forward with your purchase.

However, if the inspector discovers some defects, you now need to make a plan of action to resolve the issue or just cancel the contract.

Red Flag Alerts
Some red flag issues are hidden and hard to see at first so make sure your inspector keeps a keen eye on the following:

•Lack of general maintenance. A home that hasn’t been properly taken care of for many years could have major issues – such as water damage — lurking. That’s when due diligence is especially needed during an inspection.

•Too many issues in a home that isn’t old. Some issues are typical for a home’s age and location and not the sign of poor construction. For example, you may not mind a fixer-upper that has “good bones” located in a certain neighborhood. However, you do want to stay clear of a home that isn’t really that old for the amount of work it might entail.

•Do-it-yourself additions or any DIY work that isn’t up to code. If the addition looks awkward and cheap, it probably is and could be detrimental to the home when you want to resell. Or, you’ll need to factor in the cost and time to tear down and rebuild properly.

•Termite infestation. This can wreak havoc on a home so you’ll need to determine how bad it is, how much it will cost to fix, and prevent damage in the future.

•Moisture in the basement. This can mean two things: the home’s grading has some seepage issues and/or you’ve got the potential for mold. Usually the basement will smell musty if this is the case. Mold is a serious issue and can cause health problems if pervasive, so tread carefully!

•Water marks on the ceiling or walls could signal a leaking roof, gutters rusting, or faulty plumbing. These can all lead to wood rot and other possible destruction. All can be fixed but you’ll need to determine the extent of the damage. Or this could be a sign of past issues that have already been resolved, you’ll need to find out.

•Cracks in the wall and sloping floors. These indicate possible structural and foundation issues, which can be costly depending on the age of the home.

•Toxic materials in homes built before 1970 such as lead paint or asbestos (found in some building materials). Factor in containment and professional replacement costs before you buy!

•Faulty and outdated wiring. This can be a serious fire hazard so inspectors should check for overloaded circuits and proper grounding.

Take Action

If something was red flagged in the report, you may need to hire an expert and get some estimates for needed repairs before you can move forward with the sale.

Knowing what you’re willing to fix or not fix is important. Talk to your agent, family, or friends and also call a contractor to discuss which defects are minor or not.

For some items, it could be a simple solution. A trip to the hardware store may be all that’s needed. Get a list of those items you want to fix yourself and price it out.
If you want to go ahead with the sale, you’ll need to decide if you want the sellers to fix it or offer a credit. If you have a choice, sometimes it’s smarter to hire your own contractors and supervise repairs.
Before issuing a formal “request to repair,” consider the seller’s incentive to hire the cheapest contractor or to replace appliances with the least expensive brands.

Home inspection negotiations can be stressful, don’t worry, negotiating to make sure my clients get as much as possible is my specialty! Let’s work together to help you find the right home. Email us, call us, or text us when you are ready. We will be with you every step of the way in solving problems that arise.

Stay tuned for next week’s Review Those Condo Docs! Purchasing a condo unit is like you’re buying into a business. You need to determine how stable and financially sound this “business venture” is before taking it on.

Buyers March 1, 2023

What You MUST Do When You Go Under Contract

Love Buying a Home series – Week 9 

This step-by-step series will take you through the entire home-buying process — from finding a buyers agent to settlement day, and all the details in between. Every first-time buyer will find this information-packed series easy to follow and understand. Make sure to tune in for the next few weeks! 

Once youre under contract to buy a home, you want the final stages of the mortgage process to go smoothly – you dont want anything to sidetrack the sale from here on out!  

Nothing is a done deal yet even when youre under contract. Both your future homes appraisal and your ability to lock in a good mortgage rate can affect the outcome of your purchase.  

So heres what you need to keep in mind when you reach this stage: 

Appraisal of Your New Home  

Why do you need an appraisal now? Your appraisal is the banks way to make sure the home youre buying will sell for at least the amount of money its going to lend you.   

Your lender has already approved YOU and your finances but now its got to approve the home youre about to buy.  

It wants to make sure that this is a sound investment in case you default on the loan. If the property appraises lower than the sales price, the loan might be declined. 

A licensed appraisers report is much more detailed and the only valuation report a lender will consider when determining if it will lend money to a borrower. The report will include: 

  • details on the property/home; 
  • comparisons to three other similar properties; 
  •  an evaluation of the local real estate market at the time; 
  •  statements on any issues that may hurt the property’s value, such as structural damage or even if the property took too long to sell. 

Dont confuse an appraisal with a home inspection! Appraisers are not home inspectors so dont rely on them to determine if your home is in good condition. They dont look for leaky roofs, test appliances, or any other items found on an inspection check-list. 

Locking In Your Mortgage Rate 

What exactly is a lock-in?  A lock-in is a lenders promise to hold a certain interest rate and a certain number of points for you, usually for a specified period of time (typically 30 or 60 days), while your loan application is processed. Itll protect you against any rate increases during the loan process.  However, rates may drop after you lock in and prevent you for taking advantage of any decreases during this period. So tread carefully! 

When you first look for a lender to get pre-approved make sure you find one with a favorable rate, the lowest points, and other upfront charges such as a lock-in fee. This fee may or may not be refundable depending on the lender.   

Some lenders have a float down,” whereby if your rate lowers more than a certain amount within a short time before settlement, you get the lower rate for no charge. However, YOU have to be the one to ask if your lending institution offers this option, AND be the one to keep track.   

Ask your lender upfront about what the criteria is to get the lower rate if rates fall before your settlement or refinance. 

Discuss the interest rate outlook with your lender. Will rates rise or dip in the coming days or weeks? Also determine how the ups and downs in interest rate quotes will affect your mortgage payment and your ability to qualify. What are you willing to do? 

Determine the lock-in period with your lender and have them estimate the time needed to process your loan. The lock-in period should be long enough to allow for settlement and any other contingencies imposed by the lender. 

Make sure you factor in any possible delays (construction issues, appraisal inspections, etc.). Lock-ins of 30 to 60 days are common but some may range from seven to 120 days.  Usually, the longer the lock-in period, the greater the fee. 

Have a tangible record of your arrangements with the lender in the event of a dispute. Make sure you have a written rather than verbal lock-in agreement. You MUST fully understand your lenders lock-in rules and procedures. 

Its best to obtain a blank copy of a lenders lock-in form to read before you apply for a loan. If possible, show the lock-in form to a lawyer or real estate professional. 

If your lock-in period expires, you could lose the interest rate. In this situation, most lenders will offer you a loan based on the prevailing interest rate and points, which may now be higher due to market conditions. Sometimes, though, the rates are lower. 

If the delay is the lenders fault such as heavy demand, the lock-in period may be extended; and sometimes it may be extended even if it is your fault. Again, check the lock-in rules. 

There you have it—what needs to happen right after you go under contract.  This sometimes can be a scary time because everything is getting more real at this stage, but don’t worry, I’ll be with you every step of the way!   

In the meantime, stay tuned for next weeks article, How to Navigate a Home Inspection, is the tenth article of this Love Buying a Home series. You dont want any surprises after you move in, right?! Heres the breakdown of what to expect during your home inspection and what to do if any red flags arise. 

Keep coming back here each and every week to learn more about the home buying process and reach out to me anytime with questions about how what you are learning applies to YOUR specific situation.  Just like every real estate agent is unique, so is every buyer and I’d love to help you apply what you are learning in this series to YOUR home buying plans.  Email me, text me, or call me and let’s schedule a time to talk.    

Buyers March 1, 2023

Make a Winning Offer Without Going Overboard

Love Buying a Home series – Week 8 

This step-by-step series will take you through the entire home-buying process — from finding a buyers agent to settlement day, and all the details in between. Every first-time buyer will find this information-packed series easy to follow and understand. Make sure to tune in for the next few weeks! 

Youve done it … you found the home you want to buy! Now youre ready to make an offer and tackle some of the next steps that will make you a homeowner. 

First, its time to determine your offer price and the amount of your earnest money deposit to show youre a serious buyer. Youll need liquid funds for this deposit, so make sure youre ready to write a check with your offer. 

You also need to get prepared for some negotiation tactics. DO NOT forget about your deal breakers and the maximum amount youd be willing to offer for a home. (Remember, you have a monthly” budget in mind!) 

Here are some smart tips on getting a home for a price youre happy with in the end:  

Step 1 – Evaluate the home and determine an offer price.  

  • We’ll work together by looking at the comps to see what the current value of the home is based on what’s sold most recently. From there, we’ll discuss a number of other factors, such as how long the home as been on the market, what the market is doing in general and what information I have from the seller’s agent about how many offers they are expecting.  
  • Dont just go with the asking price. A home’s asking price might be too high or too low, so we’ll do our own research to see what price makes most sense based on recent sales of similar homes.  
  • Use comps of homes similar to yours in the neighborhood or building. We’ll calculate the difference between the asking prices and final sale prices to get a feel for market conditions. Also look at those final sales prices to get an average of the current market price for your type of home. 
  • Closely compare the features of your home to the others that recently sold. We’ll determine if your home has any valued-added features that might make the price go up OR if it lacks something that would bring the price down.
  • Consider ALL variables. We’ll look into whether this home sat on the market for a while or has it just been listed and may sell quickly? Is it more of a buyersmarket or sellersin this particular neighborhood and for this type of property?  It’s not always the same answer across the board for every home.  
  • Find out about competing bids since these will affect your own offer.  I’m in communication with the seller’s agent to find out whether there will be multiple offers coming in, and based on that, then going above the asking price is most likely required. 
  • Determine your walk-away price and stick to it. We’ll make a clear decision about what price you feel comfortable paying in a way that a will have you happy with the outcome of the seller’s decision, whether you win or lose. I won’t let you get swayed to go over budget … I have a no regrets policy! 

 Step 2 — Make an offer and be willing to negotiate. 

  • Keep your offer simple with little stipulations if possible. This makes it easier for the seller to accept your offer and can help seal the deal quickly.   We’ll find the perfect balance between given the sellers what they want and protecting you and not having you give too much away.  
  •  On the other hand, be flexible when taking into account any stipulations by the seller. If you can accommodate the seller, do so if possible. For example, they may want to rent back from you for a month until they can move out of the home. 
  • Be cordial and not critical of the home. Sellers can be sentimental and may select buyers for more personal reasons than just price. Use that to your advantage!  
  • Make your offer contingent upon the findings of a professional home inspection. Youll want to be able to renegotiate or back out if major defects are found. NEVER skip this step!  If we are going to be a multiple offer situation, I may suggest that you consider a pre-inspection, which allows for you to know the condition of the home without making it contingent on the inspection.   

Step 3 — Show you are a serious buyer. 

  • Include your approval letter and put up a reasonable amount for your earnest money deposit. You want to show the sellers you are serious and are capable financially to buy this home, that means at the very least having an approval letter from a reputable lender who has already checked your documents and run your credit.  
  • Your earnest deposit should send an encouraging signal to the sellers. Depending on the situation, you’ll need to do a deposit of 1% to 5%.  These funds are deposited at the time there is an agreement and makes sure that what each parties says they are going to do happens.  The amount of your deposit will show the sellers you really want this home and are making a serious offer. 
  • Make your BEST offer based on that particular homes situation. Offers should vary on the circumstances:
  • If the home just came on the market and already has multiple offers, you may need to go higher in price and/or have fewer contingencies.  A seller is going to choose the best offer first and start negotiating with that offer, or pick one from the options and not negotiate at all. So, give it your best shot right out of the gate in these circumstances if you find yourself in this situation.  
  • If the home has been on the market for a time, you’ll need to write a completely different offer — one that is more favorable to you versus the seller.   

These are the same types of strategies we’ll use whenever you get to this step.  I’m sharing this with you now just so you can become more knowledgeable and confident whenever that time comes.  When you are ready to start talking about buying a home, just email, text, or call me and I’ll take it from there, but always on your timeline, not mine.  And, when it comes to the offer writing step, just know that the goal is to get you the home you want without going overboard.  That is possible, even now.  It takes a specific strategy that I’m looking forward to sharing with you.   

In the meantime, keep reading this 14-part Love Buying a Home series. Youll learn what you need to do once youre under contract to buy a home in Under Contract: Locking in Your Mortgage Rate and Getting a Home Appraisal. These two very important steps can affect your sale and the interest rate of your loan. Stay tuned! 


Buyers March 1, 2023

It’s the fun “House Hunting” Guide

Love Buying a Home series – Week 7 

My step-by-step series will take you through the entire home-buying process — from finding a buyers agent to settlement day, and all the details in between. Every first-time buyer will find this information-packed series easy to follow and understand. Make sure to tune in for the next few weeks! 

House hunting can be overwhelming, time consuming, and yes, even exhausting some days. But theres no reason it has to be that way if you follow some simple strategies that will streamline your search and make you shop” productively.  

But before you can even start looking at homes, you need to go through several steps in the buying process. Youll need to carefully consider your budget, location ideas, and the criteria (number of bedrooms, etc.) of your future home. 

This article will take you through all this prep work first – that way your house hunting experience can be fun once you get started!  

These search strategies also will help you make house hunting less stressful overall.  And better yet, youll have the confidence and the ability to put in an offer and, ultimately, have a successful closing.  

Youll then get a list of simple house hunting tips that every would-be buyer should keep in mind. 

First, Understand the Process  

Your first step is to become educated about the process of buying a home in this market.   I want to hear from you a few months or more before you are ready to start looking at homes, just so we can talk about what you are thinking you want to do, what you should be prepared for and so I can educate you on what’s happening in today’s market that you should be aware of.  It’s better not to rush the home buying process, so reach out around the time you find yourself being on the apps a few times a week. 😉  

Next, Know Your Three Buckets” 

You want to house hunt with a plan and a purpose, and thats were these three buckets” play a key role – budget, location, and criteria.  

This analogy of three buckets refers to where each and every factor you need to consider when house hunting fits into one of these three buckets.  Each bucket doesnt have to be equal in weight” but the total weight combined of the three buckets must balance the scale they sit on. Thats your ultimate goal. 

Its also important for you to understand the following two requirements before you start viewing homes: 

  • Know where you are with the specifics for each one of the three – budget, location, and criteria; and  
  • Know how each one can affect or influence the others in your search for a home. 

Undertaking this step and seeing how each is linked is essential! If you pour” too much in one bucket, youll need to adjust another bucket, and so on.  

For example, if you need to lower your budget, then you might need to change the location if homes are more expensive in your first choice of location OR you might have to consider getting a smaller home (fewer criteria) if you want the location to stay the same with that new budget.  As you can see, one adjustment leads to another adjustment!  

Looking at budget, location, and criteria in this way can help you find the alignment you are seeking, which can lead you to a home that is affordable, in a location that meets your needs, and that satisfies most of your wants.  

Lets do a review of the three buckets: 

  1. Budget — How Much Can You Really Afford?

One of the first steps before you house hunt is to get pre-approved for a mortgage by a lender. Being pre-approved” carries more weight with sellers than being pre-qualified.” 

Going through this process requires you to know your monthly budget and what you can afford to pay toward a mortgage. We emphasize monthly mortgage payments, first and foremost, before you move on to price range.  

Once youre pre-approved, youll have narrowed down a price range you can afford. Then you can search for homes within your approved amount. (But remember, even if you are approved for more by a lender, stick to your own monthly budget requirements!)  

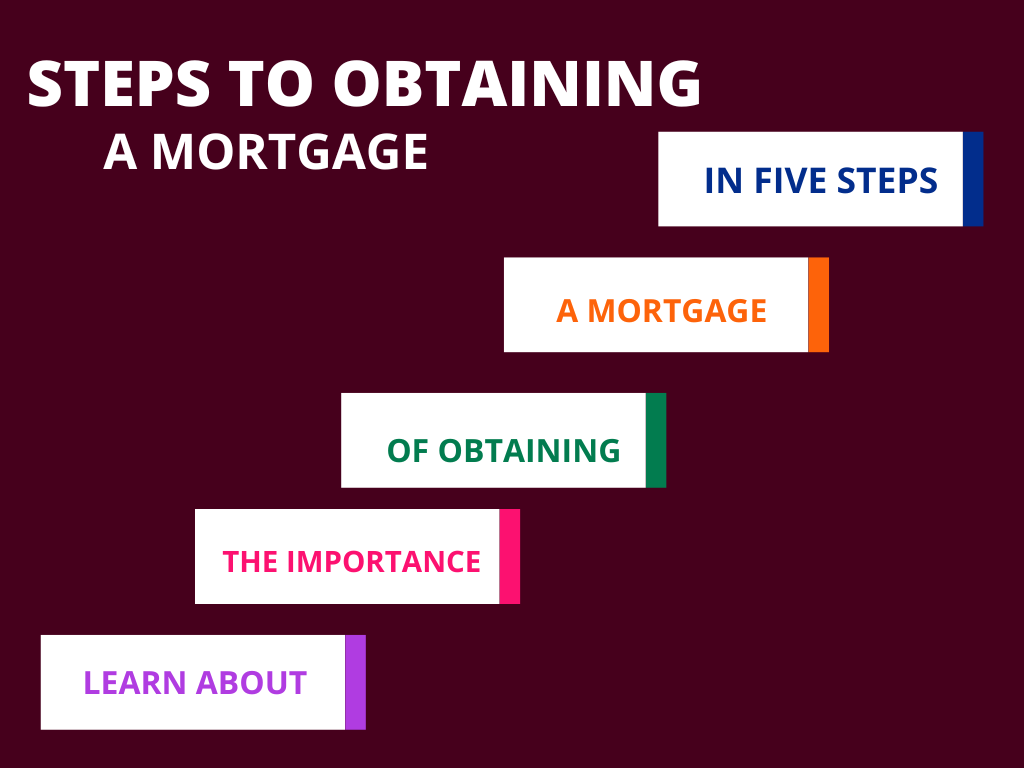
You can review this budget process in two previous articles from this series: Do the Math – A Mortgage You Can Afford (LINK) and 5 Steps to Obtaining a Mortgage. (LINK) 

  1. Location – What Lifestyle Are You Looking For? 

Once youve got your budget done, its time to move on to location, location, location. 

Remember that the location of your home will affect everything about your lifestyle and day-to-day life – from whether it has urban conveniences or will mean a longer commute to work.  So always keep that in mind. 

First figure out WHERE you want to live, CITY, NEIGHBORHOOD, SCHOOLRIC DIST?  Which specific neighborhood or even another similar neighborhoods do you picture yourself living in? 

Think about the characteristics of a neighborhood and ask yourself why is that important to you since it could be replicated it in a similar, less expensive neighborhood.  Dont be hesitant to even look at another similar neighborhood that wasnt originally on your radar. It could meet your wants and needs too! 

Really think about your daily life.  Love walking to work and dont want that to change?  Then, that becomes a must” and some of your criteria could change (size, condition, etc.). Then you know you are willing to buy a smaller, more affordable home if you must live in a neighborhood you absolutely love near work.  

There are certain factors in a location – both desirable and undesirable — that you should consider when you look at a home for yourself and for resale value. Does the neighborhood have good schools? Is the home on a busy corner lot?  

Also, keep in mind that revitalizing neighborhoods can be on your list if “desirable” neighborhoods are out of your price range. An up-and-coming neighborhood could be a bargain if you time it right, but you do need to tread carefully. 

Once you narrow down a location, your budget will determine what type of home you can afford in that particular neighborhood – such as a detached home, townhome or condo unit. 

Not happy with the results? Then you will need to adjust your buckets.” Decide whether it makes sense to change neighborhoods, tweak your budget a bit, or maybe rethink your list of must haves.”  

  1. Criteria – What Do You Want and Need in a Home?

Your criteria are things like how big of a home, how many bedrooms or bathroom, storage space, condition, etc.  Aspects about the home itself you require. It can include both needs and wants. 

 You should have a written a list of your needs and wants in a home from when you first met with your agent. Now is the time to look over that list again carefully and REMEMBER these items!!  

Its very easy to get sidetracked once you start looking at homes and forget what your deal breakers are in a home.  

This list will make your search much more efficient and keep you focused on what is important to you and your family in a home, in a location, or in a lifestyle that you picture yourself in every day. 

You might never find the perfect” home but you must decide what you need and also want in your first home.  

Remember that your needs are different than your wants. You need two bathrooms but want a master bath and suite. You need three bedrooms but a fourth bedroom would be nice for guests. See the difference.  

It definitely can be hard to choose what you prefer more (location or three bedrooms) or what youre willing to do without (large backyard or updated, renovated kitchen). Thats why you need to keep referring to your list of must-haves and deal breakers to stay focused.   

If you are having a hard time with this step, sometimes a good question to ask yourself is “how long do I plan on living in this home.”  Sometimes that can help prioritize what you want in this home vs. what maybe can wait until a future move.   

Go back and review How Your Needs and Desires Lead to Home Sweet Home” (LINK) to get more details.  

Then, Put It All Together 

Now that you understand the three buckets – budget, location, and criteria – its time to put them all together. Ive shown you a little bit of how you have to adjust each bucket at times in order to find a home. Lets now go into a bit more detail. 

Depending on how long your plan to live in your new home, you should rank the three buckets from most to least important. Yes, they are all important, but what is YOUR #1?   

Once you know your #1 bucket, you can start house hunting since you have a specific goal in mind. But, if you get frustrated or stuck, then you might just need to fine-tune or loosen ONE (not all) of those buckets. Thats why its important to be flexible on some things and know your deal breakers. 

For example, if you want to live in a home for 5 years and location is your #1 bucket, you might have to make adjustments to your criteria in order to afford a home in that neighborhood. You might have to get a home that needs work so you dont blow your budget. Or maybe youll need to buy a smaller home or condo.   

This above example shows how adjusting your criteria – going smaller or not move-in ready – enables you to stick with your location and budget. That one bucket was adjusted so that you could hold firm on the other two. 

This give and take in balancing or aligning the three buckets helps make your home search more methodical and organized.  Most buyers have to make these adjustments while house hunting so dont be disappointed if you do too. 

Do You Need to Adjust Type of Home? 

As you make adjustments to your buckets, you may have to change the type of home you initially thought you would buy. This is your criteria bucket and type of home – single detached home, townhome, condo — is a big one for it! 

Once youve narrowed down a location and hold firm to that, youll have a better idea of what type of home you can afford in that particular neighborhood. If you have your mind set on a different type of home, then you might have to rethink location (consider one with similar characteristics but with more affordable homes). 

There are pros and cons to all types of home, and that is something you can discuss with your agent who can help you sort through the details of each. 

For example, a condo unit in a building can provide homeownership for less cost since you dont have a yard. Youll also benefit from some onsite amenities such as a pool or gym, maybe a doorman … but remember you will have to pay HOA fees. So youll need to factor in all costs. 

A townhome can give you a bit more privacy and independence compared to a condo but may cost more to purchase. In this type of home, you may be able to enjoy your small bit of yard. Plus, there is usually lower maintenance and cost than a detached, single-family home with the same interior space.  

A detached, single-family home will give you the most independence but can be costly since it can require more maintenance both inside and outside. Are you ready for that responsibility? 

If you see yourself living in a home for 5 years but not much more than that, buying a condo or townhome can be a stepping stone to a detached, single-family home. Again, discuss this with your agent and understand the outlook for your local market. 

Now Youre Ready — House Hunting Basics 

Now that youve got your three buckets aligned (or know how to keep adjusting them), you are ready to actually go see homes. And, more importantly, will have the confidence to put in an offer when you see one! 

 Here are basic tips for this part of the process: 

Stay Organized and Focused Each Time. Keep a record of all your research and handouts on the homes you visit. Its very important to set up a system that works for you so you can easily refer back to homes that day or the next. 

Write down comments of your likes, dislikes and any other helpful, more detailed observations. Use a system that you know works for you, whether its on paper, in your Notes app or whatever. Do it as soon as youre done or during a viewing. Did you get a positive first reaction walking in there? Did you enjoy the brightly-lit rooms? Did you smell odors from a nearby restaurant? 

Dont forget to take lots of pictures or videos to help jolt your memory when a day of house hunting is done. Youll be amazed that you start to forget what youve seen in certain homes: beautiful hardwood floors, amazing fireplace or a view of a dumpster.  

Take a picture of the front door/home number of each home first so you know the pictures/videos that follow belong to that home. 

If you do this, then you can easily go through your notes and pictures to compare costs, neighborhoods, and home features. This also helps you stay focused on your needs and wants. And if you do need to make an offer quickly, youll have more confidence in your decision since you have your research right in front of you. 

On the flip side, youll know what homes can be deleted from your list after you review your pictures and notes after a day of looking.  Maybe a home was a maybe” initially, but now that you have time to think again, you can move it to your no” list. That way youre all set for the next day of house hunting OR youre ready to make an offer on a yes” home. 

Create a Schedule That Works for You. Make sure your agent is aware of your time schedule and expectations. Do you like to look at one or two homes in a session? Four? Eight? Weekends or certain weeknights?  

Your agent can better serve you and any time constraints if you make these arrangements from the get-go. Your schedule also will be affected by your local market and if homes are moving quickly or not. You may need to up your pace so you dont lose out on a potential home. 

Dont Forget to Ask for Drive-Bys. Dont spend time driving around a neighborhood without a purpose! If you like driving around by yourself looking at homes, ask for a list of drive-bys or homes on the market you can consider from the outside (and at different times of the day and night).  

If one appeals to you, then your agent can make an appointment to see the interior so you dont just rely on Internet photos.  

Many times, the outside, the street, the neighborhood is a deal breaker so just move on down the list. 

Communicate With Your Agent (and Yourself). Honest communication is essential. Express your likes and dislikes after seeing a home. Dont be afraid to tell your agent what you really think since they wont take it personally … they dont own the home!  

If you are more open with your agent, then they will know your personality better and can identify homes that will appeal to you. They will get a better sense of what you are looking for after each visit when you are honest with them. 

Never feel guilty or pressured! Even if you may see a home that is in pristine condition and move-in ready, dont be afraid to say this isnt the home for you if it doesnt meet one of your must-haves” for some reason.   

Or, you may be interested in a home thats a major fixer upper” or is being sold as is,” which means the seller has no intention to do any repairs. Your agent can help you determine if you are ready to undertake such a project in order to become a homeowner.   

By following these smart house hunting strategies and knowing your three buckets,” you will find your new home in no time (and maybe have some fun along the way)!  

Taking your house hunting seriously while having a lot of fun together is what it’s like to house hunt with me.  Let’s work together to help you find the right home.  email, text or call me when you are ready and I’ll be with you every step of the way to give you out of the box strategies, help you find the best possible home for your budget and we’ll have a lot of fun along the way.   

Buyers March 1, 2023

Five Steps to Obtaining a Mortgage

Love Buying a Home series – Week 6 

My step-by-step series will take you through the entire home-buying process — from finding a buyer’s agent to settlement day, and all the details in between. Every first-time buyer will find this information-packed series easy to follow and understand. Make sure to tune in for the next few weeks! 

Today’s mortgages are not one-size-fits-all.” That means you’ve got lots of options out there that could fit your budget and finances. This is good news for many home buyers!  

However, you do need to do your homework first so that your mortgage application can be processed properly and with success. The lending environment can be complex and complicated at times. Lenders, underwriters and mortgage insurers must all complete certain steps before they can have your financing in place. 

It’s important to try and keep things going smoothly by taking on a few steps of your own, and knowing what needs to be done next. This preplanning will help get your mortgage and financing all figured out. That way you can avoid any snafus when you least want them to appear. 

Once your mortgage situation is all set, you’ll be in a much better position to negotiate with the sellers and move forward on a purchase. Here’s what you need to keep in mind: 

  1. Evaluate your affordability and don’t forget about monthly budget. 

Do you truly know how much mortgage you can afford and how lenders determine it?  

Lenders and mortgage insurers look at a variety of factors, but the two most important are your monthly mortgage payment and your total debt load, relative to your gross income. You may hear a lender call this your debt-to-income ratio.” 

But wait, let’s hit pause first and ask this question instead: How much are you actually comfortable spending on a mortgage payment each month?  

This is a much better way to determine your affordability. It’s important to emphasize knowing what your monthly budget is for housing, NOT just the purchase price that your lender will approve you for!  

Many of you will want your monthly housing expenses to be much lower than what a lender is willing to lend you. This topic was covered in detail in Do the Math – A Mortgage You Can Afford,  the fourth article in this series. Go back and review if you need a refresher. 

This article makes you carefully look at your monthly budget, including current expenses and future ones as a homeowner. 

  1. Shop around and interview lenders to find the best fit for your needs.

Talk to several lenders at different sized banks. Rates and fees are typically very competitive between lenders, so it’s often more important to focus on other factors, including the level of service provided and how well they’ve executed transactions for other buyers.  

The type of mortgage you are seeking may also impact your choice of lender, since some are more familiar with certain mortgage programs than others. This is so important to understand, and lenders should understand that you will be shopping around. 

Different banks can offer different programs, especially in today’s market.  Buyers could save over $200 a month on their mortgage payments just by talking with one lender that has a loan program that other banks may not offer! 

  1. Discuss your loan options with lenders and your agent.

Deciding what types of mortgage are best for you depends on your personal situation, your financial scenario, and your future plans. It’s something you’ll discuss during your lender interviews. 

For example, if your down payment isn’t large enough to qualify for a conventional loan, an FHA mortgage can be an excellent option. Alternately, you may qualify for an attractive first-time home buyer program offered by a local jurisdiction. 

Mortgage programs are always changing. You need to sit down with your lender to understand the different options out there that could work for you and the type of home you most likely will purchase.  

  1. Get pre-approved (not pre-qualified) by your lender.

Plan to complete a loan application with one or more lenders.  Make sure to take it one step further from getting pre-qualified and get pre-approved instead. 

 By doing this you will know exactly what loan amount you will be approved for by the lender. (Remember, stick to your monthly budget no matter what you get approved for!) But this does give you the go ahead to look at homes in a certain price range. 

To start this process, you will need to supply information to the lender along with your application. So make sure you’ve gathered the required documents before you meet with them. To get pre-approved, the lenders will perform an extensive check on your financial background and credit rating. You will be notified in writing the amount they are willing to lend you for a home purchase. 

This process is an important step that will put you in a better negotiating position with sellers. Your pre-approval signifies to sellers that you are a committed buyer who has financing secured. When you make an offer, it won’t be contingent on obtaining a mortgage. 

  1. Commit to a lender once you’re under contract.

As soon as you are under a contract to purchase a home, you must lock-in” and commit to working with one lender to complete your mortgage application. This needs to happen immediately upon going under contract to meet the deadlines you’ve agreed to in your offer.   

You will probably be charged a fee at this point because this is when the lender starts incurring processing expenses on your behalf.  

Show your lender that you are serious about working in partnership with them by submitting all the required documentation as quickly as possible.  At this point they also will be approving” your home and will await its appraisal to determine if they will lend you money. You want the appraisal to come in at or above the sales price. 

As you can see, there are certain steps you’ll need to take to get a mortgage.  I can help you navigate through them.   We want to meet to get the mortgage process out of the way well before you want to start looking at homes, so email, text or call me when you are ready.  I’m here for you! 

Stay tuned for next week! It’s the Fun House Hunting” Guide is the next article in Love Buying a Home series. You’ll find out the ways you can shop productively (and smartly!) with tactics that will streamline your search.